Boxcab - JBRR
Main menu:
- Home
- Locos
- Rolling Stock
-
Structures
- All Structures
- Industries
- Off Layout
- Railroad Property
- Town & Country
- Layout
- Vehicles
- Figures
- Events
- Articles
- What's New?
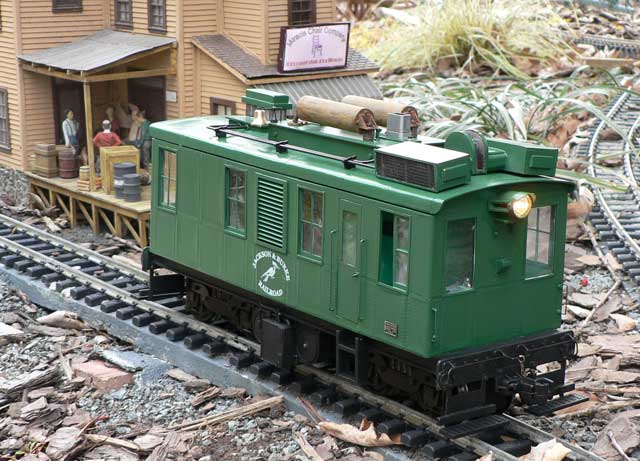
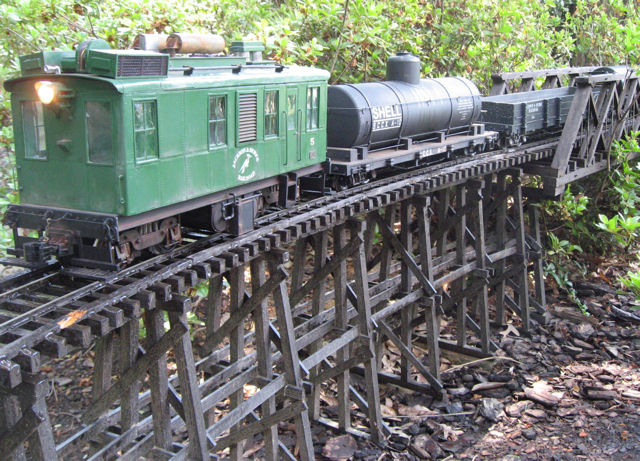
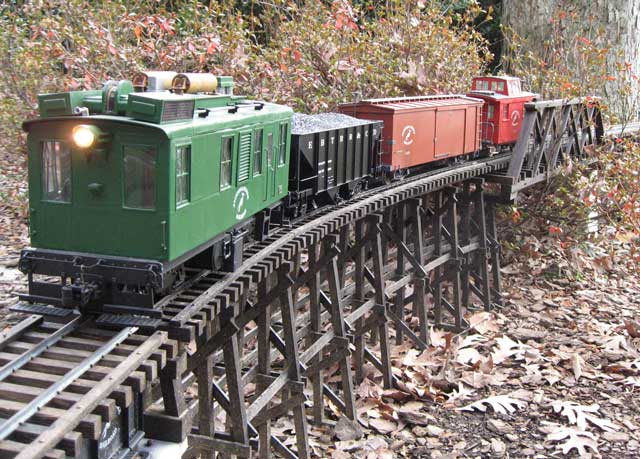
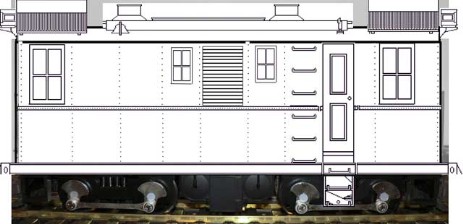
Boxcab
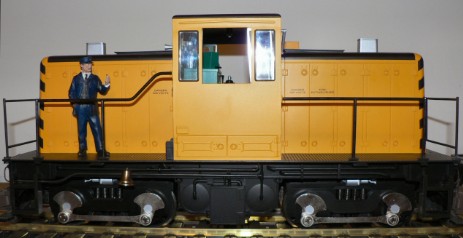
In December, 2005, one of the retailers had a special on the Bachmann 45 ton Diesel.
It’s a big model! I powered up a section of track and made sure it worked OK.
It ran nicely, and can go quite slow.
But, it really didn’t fit my era. It’s a bit more modern than I liked, so I decided to do some research and see what I could find.
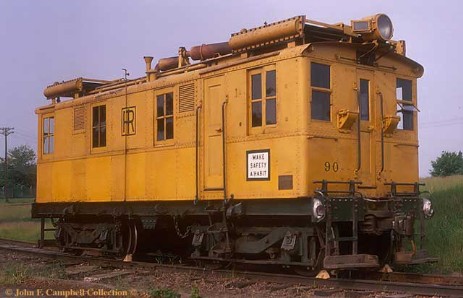
One of the early diesels was this one from ALCO built in 1926. It was a 60 ton “Oil-
It’s standard gauge, but I like the basic shape and details.
Since I’m not modeling an exact model, it’s time for some modifications.
I made a computer mockup on top of a photograph of my model, and added some of my own modifications, including the grill on the side.
I ordered some plastic from Plastruct and started measuring for battery and RC.
I’ll put some detail in the cab, as the windows will let a lot of light in.
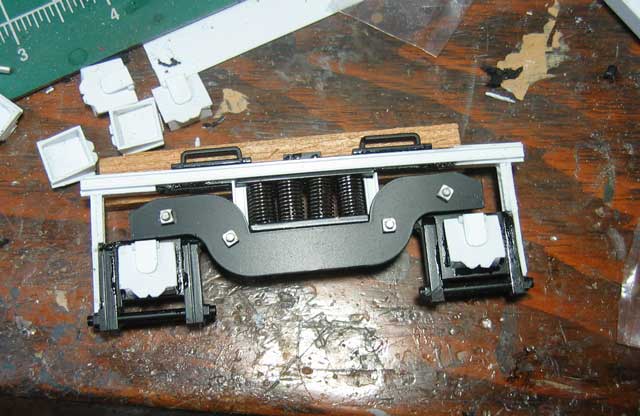
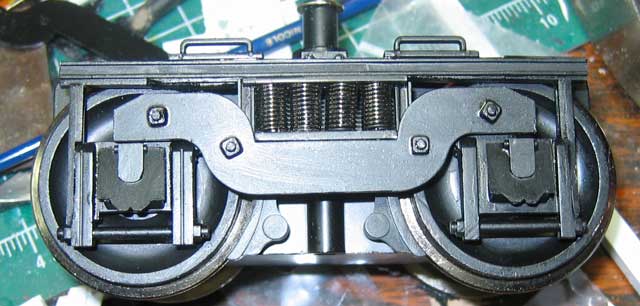
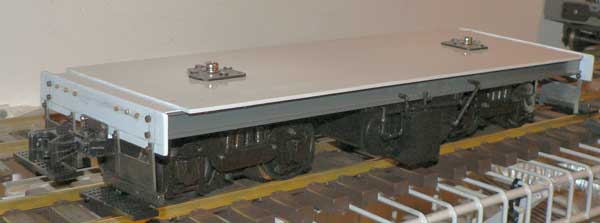
The Trucks
I didn’t like the look of the original trucks; while they look OK under that model, they just don’t look like boxcab trucks.
First, I removed the side rods. They serve no functional purpose and were typically not used on boxcabs since they had a traction motor on each axle. I wanted a more open looking truck, so I cut away a lot of the plastic that was hiding the wheels.
I built some journals out of styrene and added some other parts and some cast nuts for “detail”.
I ended up building a frame using styrene sheet and some I-
Click on the thumbnails below to view the trucks.

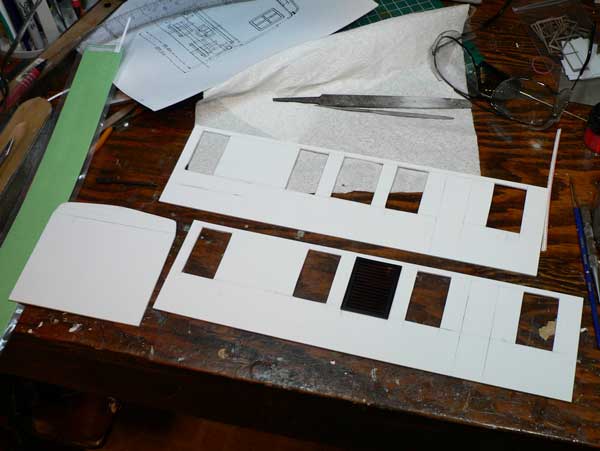
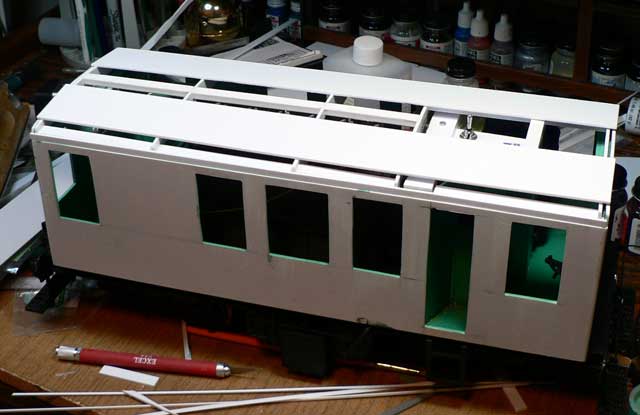
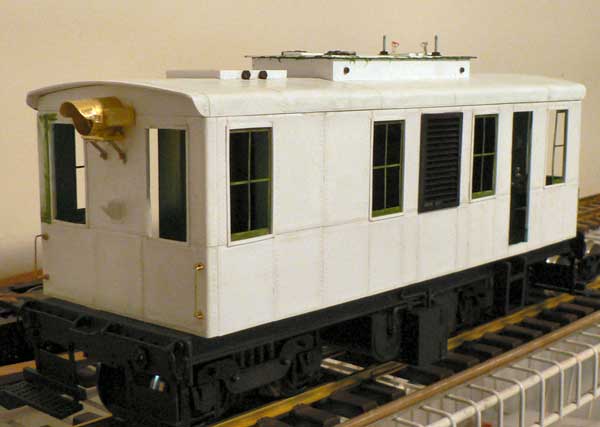
The first part of buliding the body is to cut the sides and ends from styrene.
Then, I cut the openings.
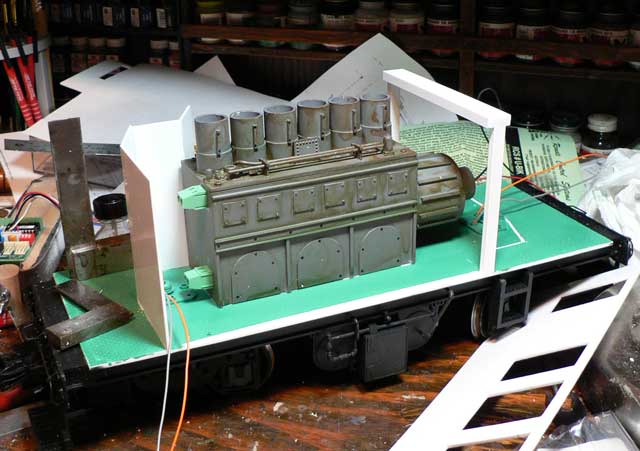
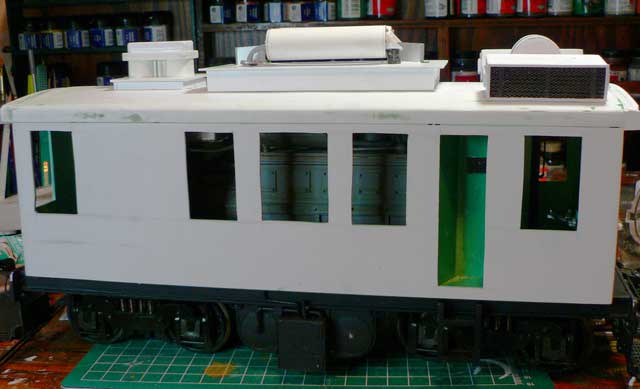
I made the battery housing look like a diesel engine; at least when viewed through the window, though I’m starting to suspect that my “diesel engine” will be very tough to see once the windows and the roof are in place.
I decided to use the door from the original model.
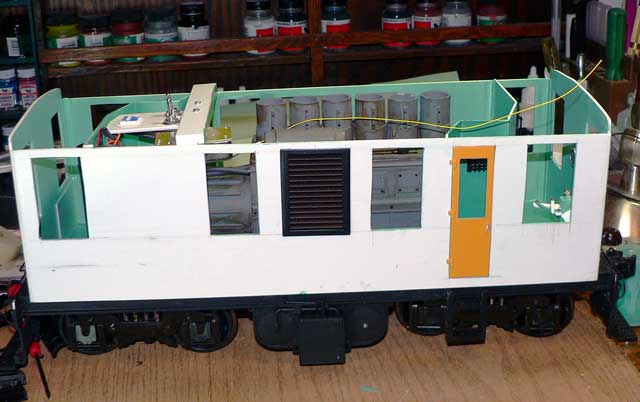
Next up is the roof. It will have to be removable just in case I ever need to access the electronics.
There are two switches pictured: one for power and one to control the volume of the sound.
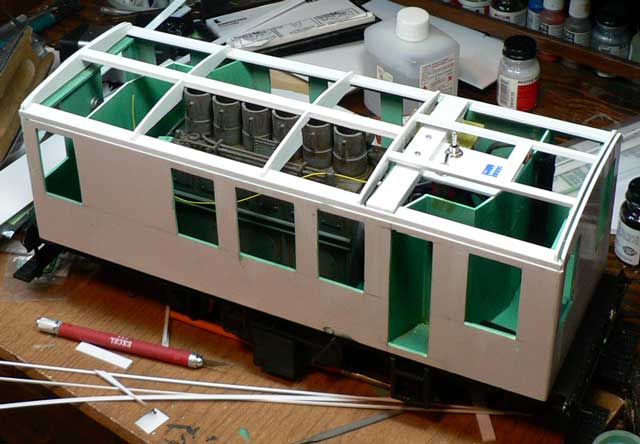
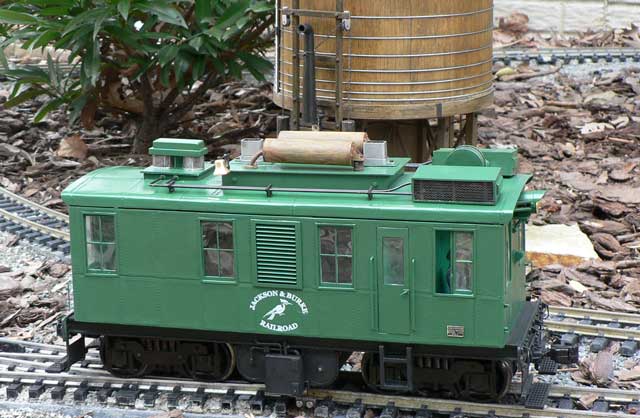
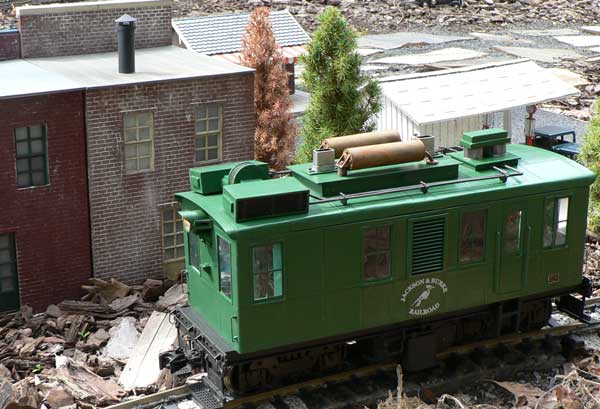
The Roof
The roof needs to be removable, so that I can get to the electronics if necessary. I started by making a frame, then I used strips of styrene to “plank” it. The strips allow the plastic to easily follow the curve of the roof.
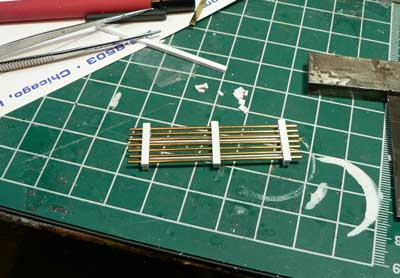
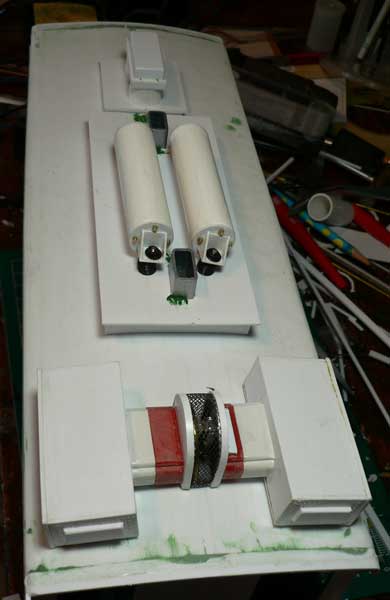
Next, I start on the roof details. First, I wanted some radiator looking bits on top, so I built them out of some brass rod and styrene.
The mufflers are built from styrene tubing.
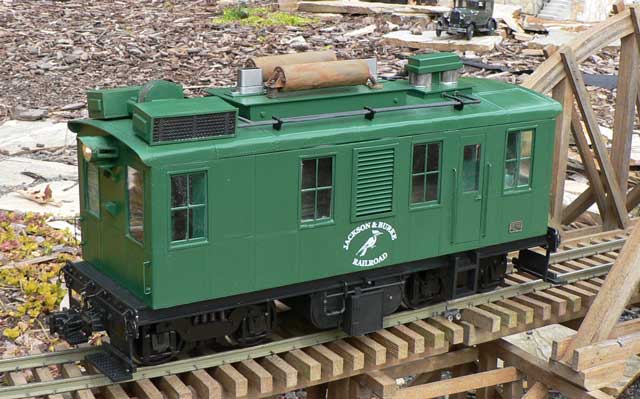
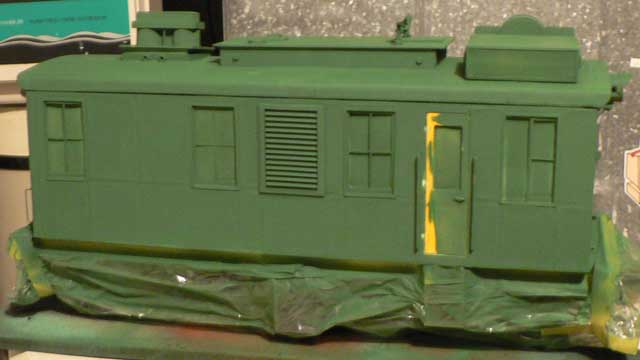
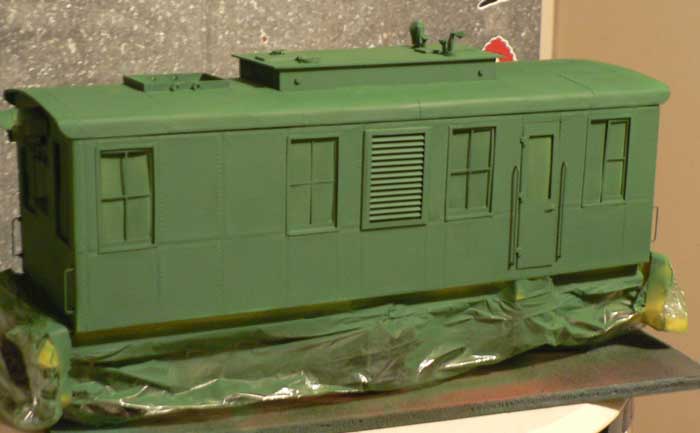
Painting
I panel the frame by using individual sheets of .010” styrene cut to shape and then embossed with a rivet pattern using a tracing wheel from the fabric store.
I’ve added the headlights and the grab irons.
The radiators, piping, air cleaner, and mufflers have all been removed so all I have to do is tape it up and send it over to the paint shop.
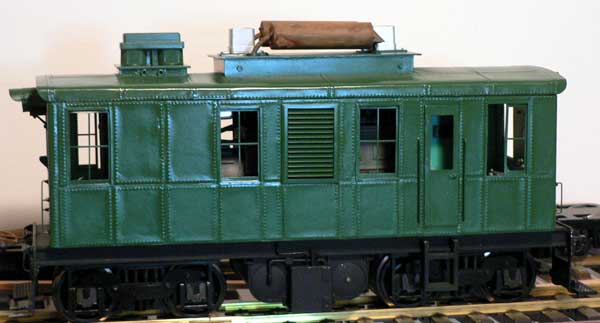
All completed and ready to go into service.